

 |
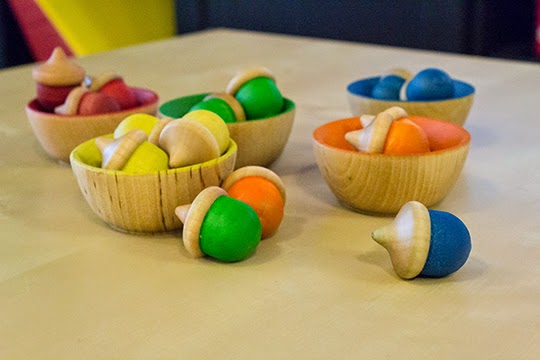
| Still a little early to really get "matching" - but distributing them among the bowls was fun on its own... |
 |
| ... as well as pouring them back into the main bowl, which for this activity is one of my salad bowls. |
 |
| Stacking the bowls. |
Here's how to make one yourself:
- wood bowls (5)
- acorns (1 bag of 25)
- watercolors, tube (which is what I used) or liquid watercolors
- a watercolor brush with a fine point to paint all the way to the acorn cap
- non-toxic wood sealant - note that I haven't done this yet - I just used a butcher block oil that included beeswax (Boos board block cream) and it seems to work fine, though you may still have some of the dye rub off while wiping off the excess. Here's another way to do it.
While you're in the Woodworks store browsing around through the wooden goodies full of potential, I recommend checking out the little people (painted gnome project with felted hats?), the spools and tie pegs (DIY birthday ring decorations?) or maybe throw in a few rounded hen eggs for a quick and easy kitchen toy. I grabbed 6 and cut an egg carton in half that I was saving for exactly this sort of thing. That's it! A bonus quick and easy DIY toy! (PS. I will likely be using this site for other future DIY projects, so if you like this project, keep it bookmarked.)
Back to the sorting toy, pick out five watercolors that you'd like to use. I chose the classic rainbow (minus purple) for mine. I used tube watercolors because I already had some on hand, and I wanted to paint them on so I could leave some of the natural wood exposed, like the acorn tops. Three acorns fit in one little bowl (save the extras for your nature table or other activities, or if you eventually decide to get more bowls and add colors).
I painted the bottom of the acorns, three to each color, as well as the inside of the wood bowls. I wanted them to look a little finished and didn't had any standalone beeswax polish on hand, so as soon as they were dry, I used my Boos block board cream. It contains beeswax, it's food grade and therefore non-toxic. :)
That doesn't mean these are a good idea for kids who are still putting things in their mouths... without a proper sealer, the color will come off a bit. Not a lot. I tried washing a painted acorn in water just to see, after using Boos, and some of it came off but not a lot. I do plan on sourcing a non-toxic sealer to permanently seal the colors on.
The project took about an hour to complete, and cost $13.25 for the wood materials, not including shipping (I got a bunch of other stuff for future craft projects anyway). The standard shipping for me was $5.95. Not bad, eh?
The project took about an hour to complete, and cost $13.25 for the wood materials, not including shipping (I got a bunch of other stuff for future craft projects anyway). The standard shipping for me was $5.95. Not bad, eh?
No comments:
Post a Comment